
And here's Matthew's fabulous Hot Chocolate Mouse that he made for me...
and the tutorial for you!

Hot Chocolate Mouse
{ by Matthew Mead }
I have so enjoyed contributing to Amy Powers' Inspired Ideas magazine holiday this year that I wanted to do something more in the exchange of ideas. Amy and I decided to make ornaments for each other and this was what I dreamed up. I knew Amy loves miniatures and I wanted something that not only spoke to that, but that was also charming and fun and reminiscent of what really makes you smile at the holiday times. My HOT CHOCOLATE MOUSE ornament is pretty simple to make and once dried can be used year to year on your tree, or to hang from a twig or on a mantel.
YOU WILL NEED
Model Magic clay in brown, white gray and black
Mini tea cup or ramekin
6 Silver floral wire cut into 1/2 inch pieces
Mini plastic tasting spoon or handle from plastic spoon
Tweezers
Twine
1 red cherry cake decoration or sprinkles
Quick craft glue
Hot glue gun
Mini letter stickersYOU WILL NEED
Model Magic clay in brown, white gray and black
Mini tea cup or ramekin
6 Silver floral wire cut into 1/2 inch pieces
Mini plastic tasting spoon or handle from plastic spoon
Tweezers
Twine
1 red cherry cake decoration or sprinkles
Quick craft glue
Hot glue gun
Mini letter stickers

I started with this model magic clay from Crayola which is available at the crafts store or the toy section of a department store. It is soft and easy to work with and comes in lots of great colors. Once shaped you simply let air dry and within 72 hours it has a bouncy, firm feel.

I started with a spare miniature handle less tea cup from a child's tea set... but other small items like a pinch bowl or ramekin would work. Fill cup to the top with brown model clay.

Press clay down into cup and smooth top with fingertips. Insert spoon which will become handle for hanging ornament.

We used gray clay to make our mouse, but brown or white would also work. To create a smaller ornament we worked in a small scale, but you can make your creation in any size or shape you want.
Our body measured 2 3/4 inches and the head measure 3/4 of an inch. The legs, tail, paws, ears and eyes were all constructed to fit the scale of the body and head. Eyes were made of white and black clay white pink was used to add colorful details to the inside of the ears. We simply rolled these pieces into the desired shapes seen here.

Begin by attaching the body to the chocolate filled cup. Press the moist clay into the porcelain and then attach the head to the top of the chocolate cup. Add all the details immediately while the clay is moist. Simply press the details into place with you finger tips.
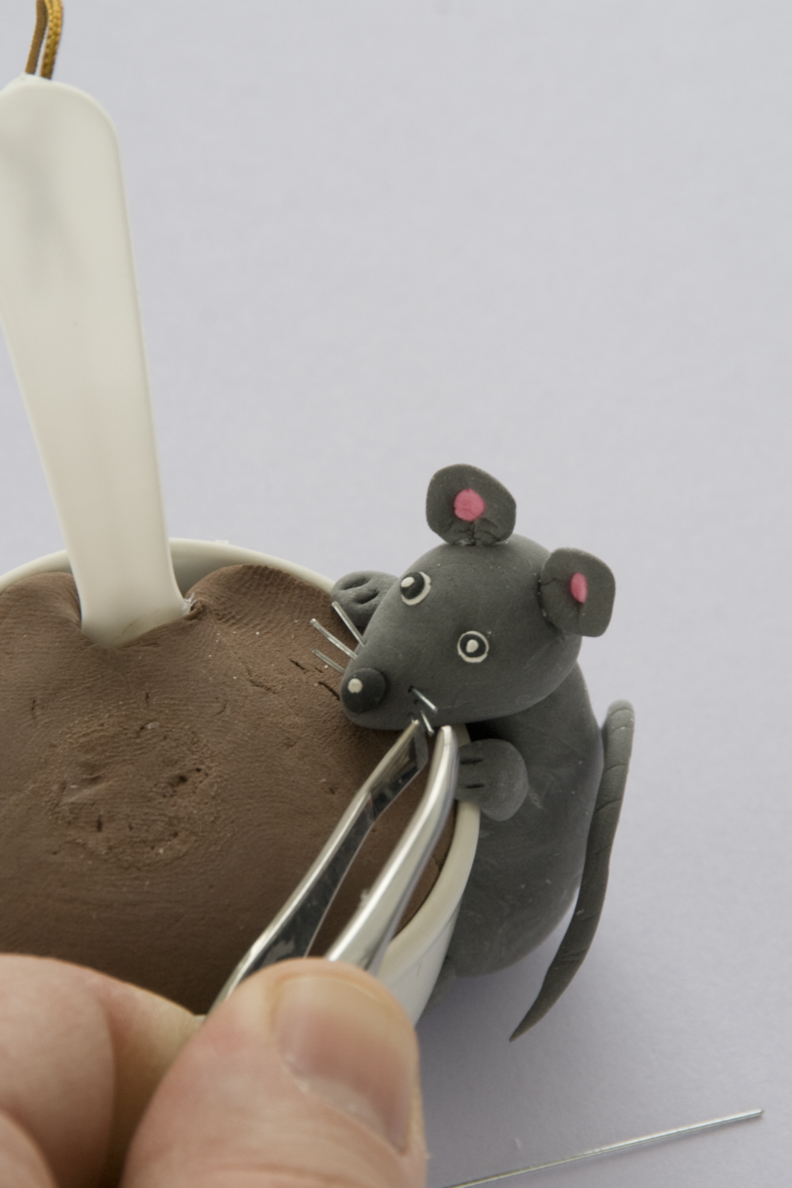
Place the cut pieces of wire into place using tweezers.

Make three small graduate disks (the largest one being 3/4 of an inch) and a top shaped like the very tip of an ice cream cone or a mini chocolate morsel. Use Quick glue to glue these together and then glue a candy on top. Glue the entire whipped cream creation to the top of the hot chocolate cup.
Lastly cut a three inch piece of twine and fold into a loop and knot. Place a bead of hot glue on the back of the mini spoon and glue hanger into place. Let dry thoroughly.
Personalize by adding the recipients name using miniature decal stickers applied directly to the porcelain.
Dry overall creation for 2 to 3 days before hanging from a tree branch.. Store in cool dry place for seasonal storage.

For more fun holiday ideas go to HOLIDAY WITH MATTHEW MEAD https://subscription.timeinc.
and buy your copy now to arrive before Christmas and check out our holiday magazine preview to get the real flavor of what is in store in the issue.

5 comments:
So adorable. And I think this is even something I can make! My daughter would love it.
Amy, I just came from Matthews site and saw your cute little snowman. Thanks so much for sharing!
That is just the cutest - both of them. Thank you both for sharing - great idea!
Oh, Amy,
Those are both so cute. I have loved both of your publications this year. I love Christmas so much and in so many ways, frivolous and deep. One of my big projects is making a little tree for our visiting minister, covered with handmade ornaments. I think I need to give that Model Magic a try.
I missed Silver Bella and remember the pleasure of sitting with you and having some time to talk. It will happen again!
Hug,
Suz
amy powers.
you are adorable.
and famous.
:)
love this
kind of sharing!!!!
Oh, Amy, Those are both so cute. I have loved both of your publications this year. I love Christmas so much and in so many ways, frivolous and deep. One of my big projects is making a little tree for our visiting minister, covered with handmade ornaments. I think I need to give that Model Magic a try. I missed Silver Bella and remember the pleasure of sitting with you and having some time to talk. It will happen again! Hug, Suz
Post a Comment